In the realm of artificial intelligence and computer vision, access to diverse and annotated datasets is crucial for training robust models. However, gathering such datasets, especially in specialized fields like medical imaging, document recognition or satellite imaging presents challenges due to privacy constraints and limited availability. Synthetic data addresses these hurdles by providing a means to generate vast and varied datasets, mimicking real-world scenarios with fidelity. The use of synthetic data lowers the cost of data collection and lifts the burdens of manual data annotation. In this blog post, I will use Rodina Flow to generate a high-quality, synthetic dataset with ready-to-go annotations.
In particular, we will focus on an object detection task in the context of satellite imaging. On Kaggle, you can find a lot of varied datasets for computer vision models. In this example, we will be using a dataset containing almost 27,000 annotated samples of aerial images of ships and other sea vessels. You can access this dataset here.
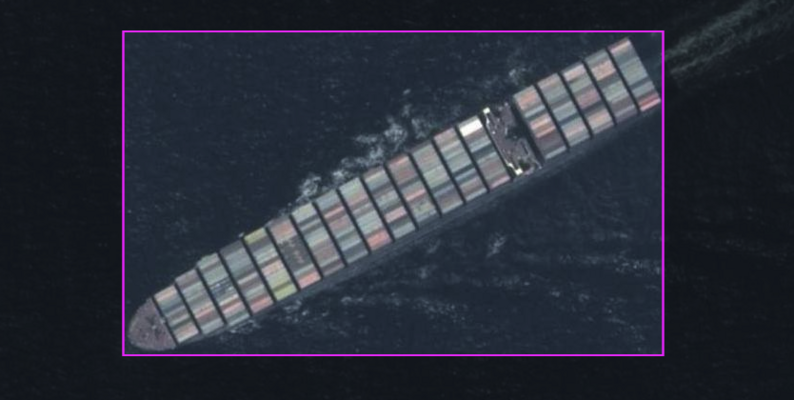
This dataset contains various types of images, ranging from close-ups to distant shots, with varying degrees of quality. To streamline our analysis, we will concentrate on a specific subset of images that depict ships from a considerable distance. Notably, we will select a subset of samples with prefixes: SA_, s, PE_, OG_, m, and GE_. This amounts to 3289 samples. We select 500 to be in the test set, which leaves 2789 training examples. We will use those to establish the maximum performance of the model if it was trained on the whole data. We also randomly selected 150 images that we will use to synthesize our dataset. In the next post, I will evaluate the performance of models trained on real and synthetic data in an object detection task. This will allow us to check how good is the synthetic data we have generated. The rest of this post will be a tutorial on synthetic image generation using Rodina Flow.
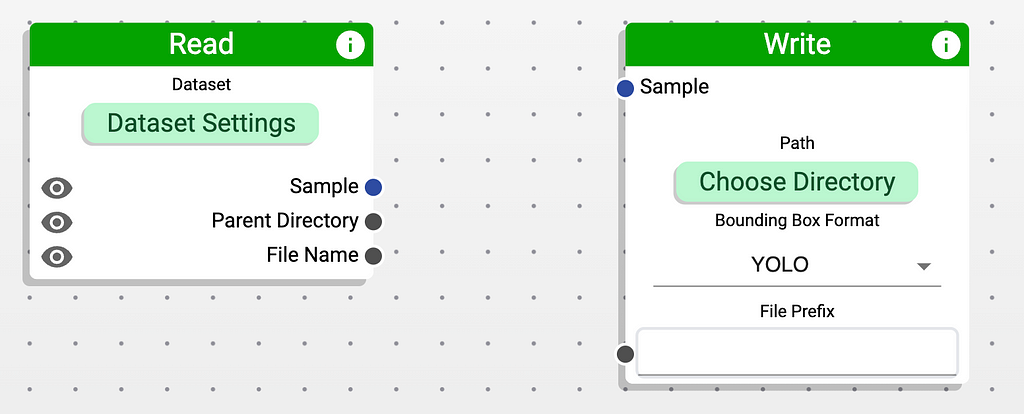
After opening the program, you can see two nodes. One of them reads the data from the disk, while the other one saves the results to your filesystem.
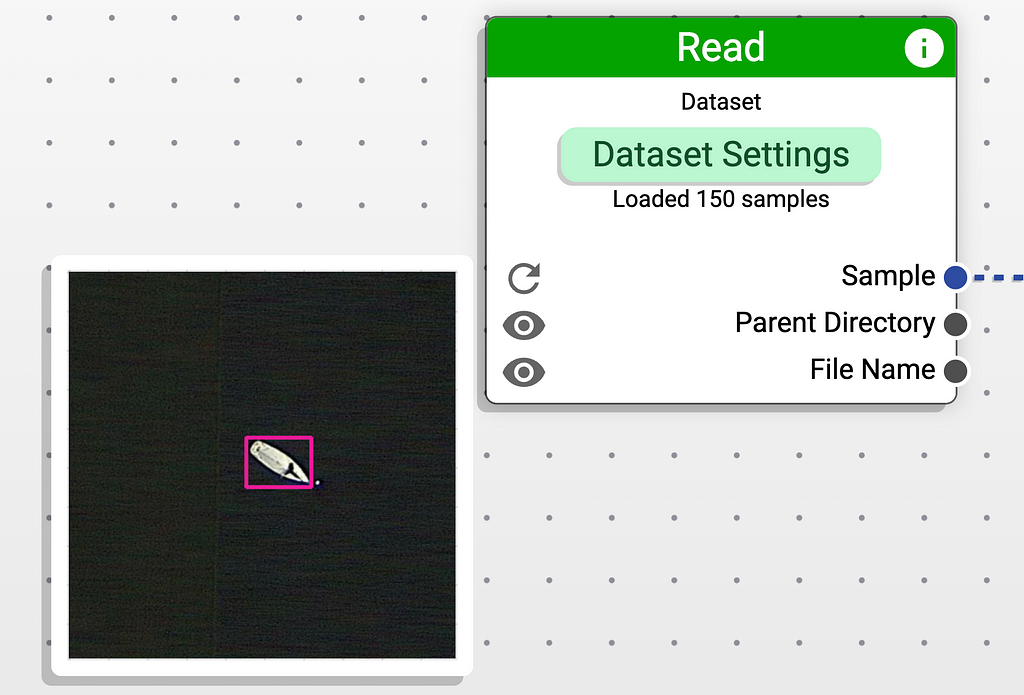
Let’s start by clicking on the Dataset Settings button on the left node. Here, you should specify the directory containing the images. In our case, those images are located in the directory stored as synthetic/source/. In the top bar, we also need to select the directory containing the annotations. In our case, the annotations are stored in the YOLO format and are located in the labels/ directory. If everything goes well, you should see a preview of your dataset.
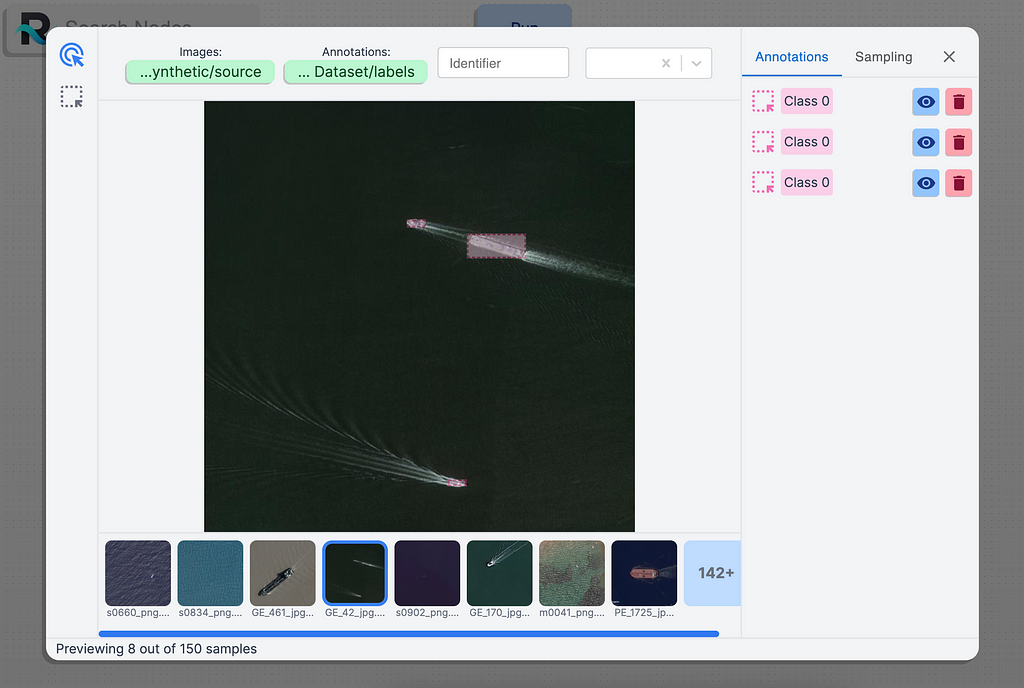
As you can see, the images are appropriately loaded. On the right toolbar, you can see that the image contains three annotations for Class 0. This class indicated the YOLO class with an identifier of 0. In our case, this identifier represents a ship.
If we exit this view by pressing the icon in the top-right corner, we can also preview the sample by hovering over the icon of the eye on the node.
Before we get to it, let’s first think about our goals. We want to:
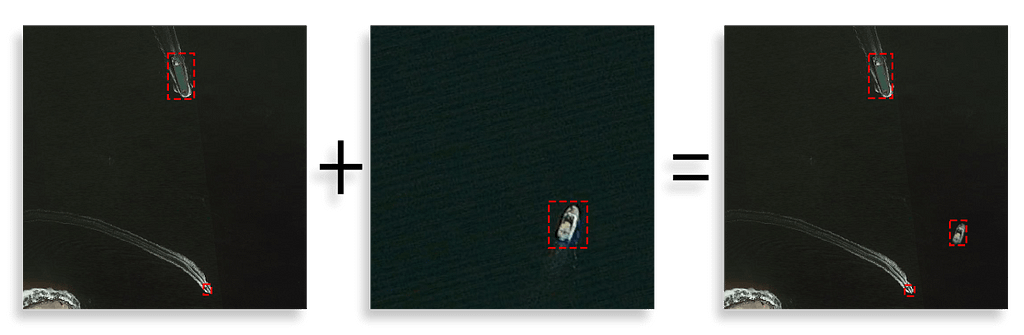
Let’s address these goals one by one. To achieve a large dataset, we will combine two images. One will act as a background and one will act as a foreground. If we cut out the ships from the foreground and paste them onto the background, we will end up with a completely new example.
To do so, we need to add one more node that reads the background image. We head to the menu in the top-left corner and simply drag and drop it in the desired location.
To address the issue of variance, we will randomly modify the samples through a simple image augmentation process. To do that, we will resize the image to a pre-defined size and then shift its hue, adjust contrast, and add some blur. We can easily make sure that these augmentations are applied with varied strengths using nodes that generate random numbers.

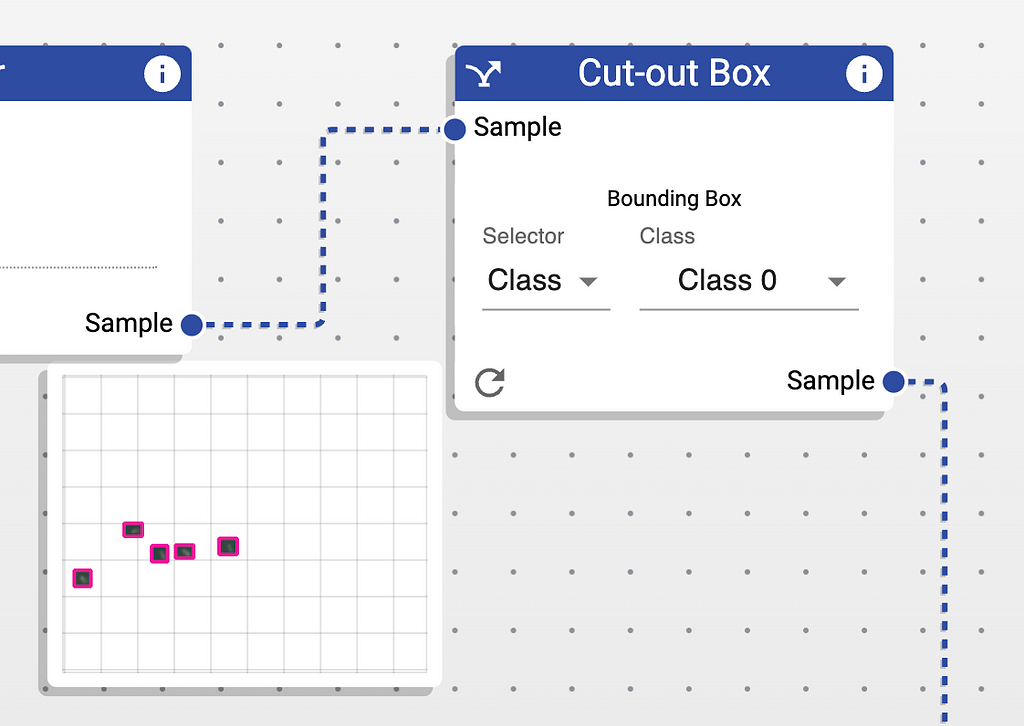
When it comes to the foreground (cut-out) ship, we need to perform some more advanced processing. First of all, we normalize the size to a standard one and slightly blur the image (again, using a random blur size). Rodina Flow provides a node called “Cut-out Box” which cuts out the bounding box with a specified class. This results in a sample where only the ships are visible, while the rest of the image (the ocean) is transparent.
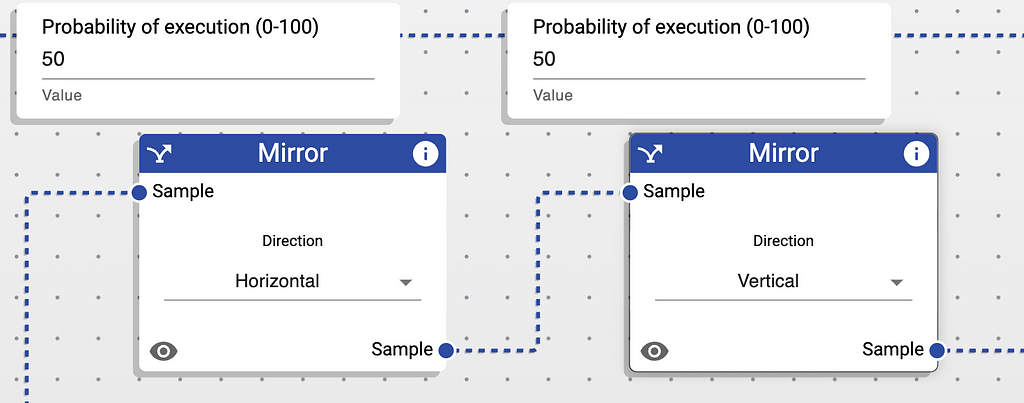
Finally, we can crop this image to content. This will remove the transparent borders such that the sample is fully contained. Before stacking the images on top of each other, we need to make sure they are the same size. To do so, we will add a transparent border to the sample, such that the result has the same dimensions as the background. We will also flip the sample with a probability of 50%. If you want to specify the execution probability of a certain node, you can click the button in the top-left corner of the node.
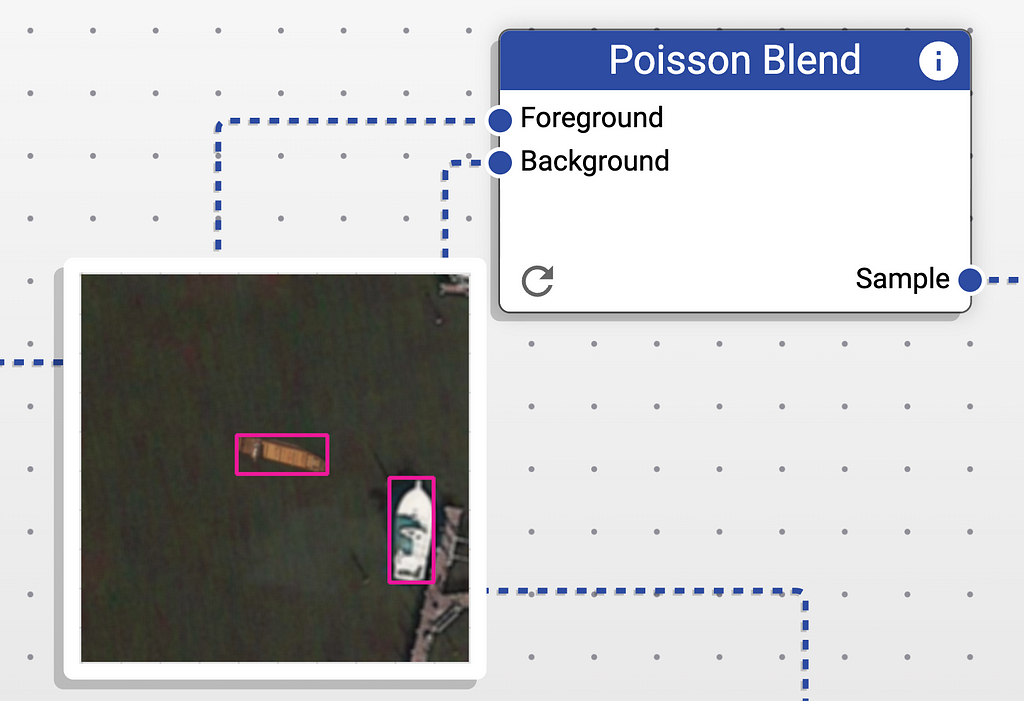
Now, we can composite these two images together. To address the final goal of realism, we will use the Poisson Blend node, which uses optimization algorithms to seamlessly blend the foreground and the background. Our final workflow is presented as follows.
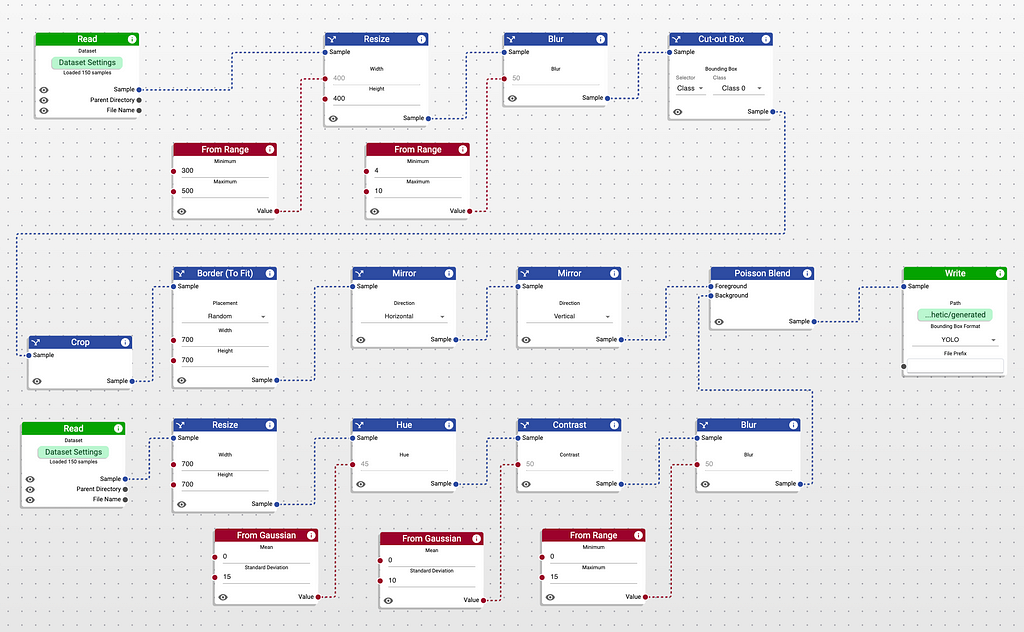
You might notice that there is a single, green node on the right. This is the Write Node, which saves the resulting dataset to your filesystem. It’s possible to choose a format of the dataset. While Rodina Flow supports multiple dataset structures, we will opt for YOLO.
We can preview the created sample by hovering over the eye icon in the Poisson Blend node. If we click it, the pipeline will be re-run with new inputs resulting in a completely new sample.
This looks very good! Let’s run the pipeline, by Clicking the Run button at the top of the screen.
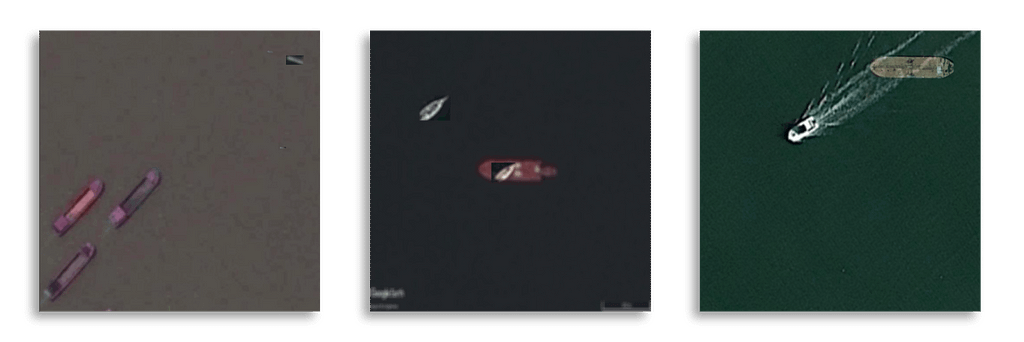
Our source dataset contains 150 images. Rodina Flow will combine every foreground with every background resulting in a total of 150*150=22500 annotated samples. Let’s look at some of the results.
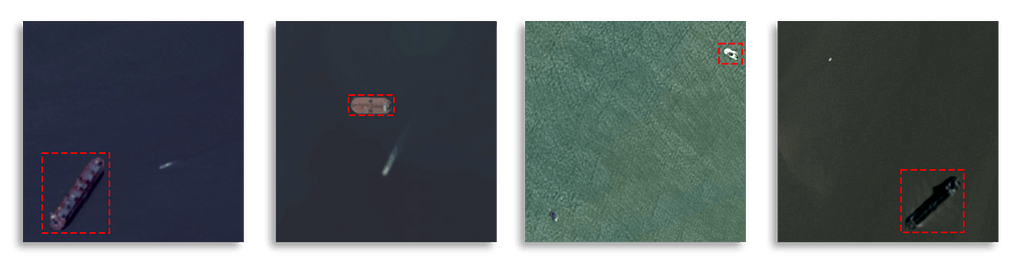
WOW! They look incredibly good. It’s close to impossible to tell which ships have been artificially pasted. In the next blog, we will see how useful this data is.
Unfortunately, some of the examples look quite goofy, but let’s not worry about it since they constitute a small minority :)
Synthetic data is a powerful tool in areas where the usage of real datasets is impossible due to privacy constraints or simply lack of high-quality data itself. Furthermore, research shows that it can be used to achieve extremely accurate computer vision models.
Rodina Flow provides an easy way to generate synthetic image datasets through image composition. It also provides multiple options for image augmentations. I hope you enjoyed this walkthrough and that you learned something. If you want to see even more, check out our blog, and in case you have any questions or feedback, please leave a comment or reach out to us directly. Thanks for sticking around and have a wonderful day!
Disclaimer: I am using Rodina Flow to generate the dataset in this blog post. I am one of the creators of this software. I want to demonstrate how easy it is to generate artificial high-quality datasets with a minimal amount of initial data.